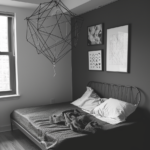
Creating a custom headboard can transform the look of your bedroom and add a personal touch. Follow these steps to design and build your own unique headboard.
Step 1: Choose Your Materials
Decide on the materials you want to use for your headboard. Common choices include wood, fabric, and metal. Consider the overall style of your bedroom when selecting materials. For a rustic look, reclaimed wood works beautifully.
Step 2: Measure Your Bed
Measure the width of your bed to determine the appropriate size for your headboard. Make sure to account for any additional width you want on either side of the bed. A headboard that is slightly wider than the bed frame creates a balanced look.
Step 3: Design Your Headboard
Sketch a design for your headboard. Whether you prefer a simple, rectangular shape or a more elaborate pattern, having a clear design will guide your construction process. If you’re unsure, look for inspiration online or in home decor magazines.
Step 4: Gather Your Tools and Supplies
Collect all the necessary tools and supplies before you start. This might include a saw, drill, screws, nails, fabric, foam padding, and upholstery tacks. Ensure you have everything on hand to avoid interruptions during the project.
Step 5: Cut and Prepare the Wood
Cut your wood to the desired dimensions. Sand the edges and surfaces to ensure they are smooth and ready for assembly. The BLACK+DECKER 20V MAX Cordless Drill is an essential tool for drilling and assembling your headboard with ease.
- Lithium Ion Technology & 20V MAX: Lighter, more compact, no memory, longer life
- 11 Position Clutch: Provides precise control for drilling into wood, metal, plastic, and all...
- Compact and Lightweight: Less fatigue and allows users to drill / screw in confined spaces. Part of...
Step 6: Assemble the Frame
Assemble the wooden frame of your headboard using screws and a drill. Ensure the frame is sturdy and secure. If you’re adding legs to your headboard, attach them at this stage.
Step 7: Add Foam and Fabric
If you’re upholstering your headboard, cut a piece of foam padding to fit the front of the frame. Attach it using spray adhesive or a staple gun. Then, cover the foam with your chosen fabric, pulling it tight and securing it on the back with staples. The Surebonder Pneumatic Staple Gun is perfect for quickly and securely attaching fabric to wood.
- AIR COMPRESSOR NEEDED NOT INCLUDED - An air compressor is needed to operate the tool. An air...
- 6,250 STAPLES INCLUDED - The kit includes 1,250 of each of the following leg lengths: 1/4", 5/16",...
- FEATURES - Staple view window, adjustable exhaust vent, easy "drop-in" staple loading, rubber...
Step 8: Install Your Headboard
Once your headboard is complete, it’s time to install it. Depending on your design, you can mount it directly to the wall or attach it to the bed frame. Make sure it is securely fastened and level.
Step 9: Add Finishing Touches
Finally, add any finishing touches to your headboard. This might include decorative trim, buttons, or paint. Customize it to suit your style and complement your bedroom decor.


